
Your Entryway Deserves Better: The IKEA Kallax Mudroom Guide
An ikea kallax mudroom setup is one of the most popular DIY storage hacks right now — and for good reason. For as little as $450 and about 5 hours of work, you can turn a chaotic entryway into a clean, functional drop zone with seating, shoe storage, and hanging space.
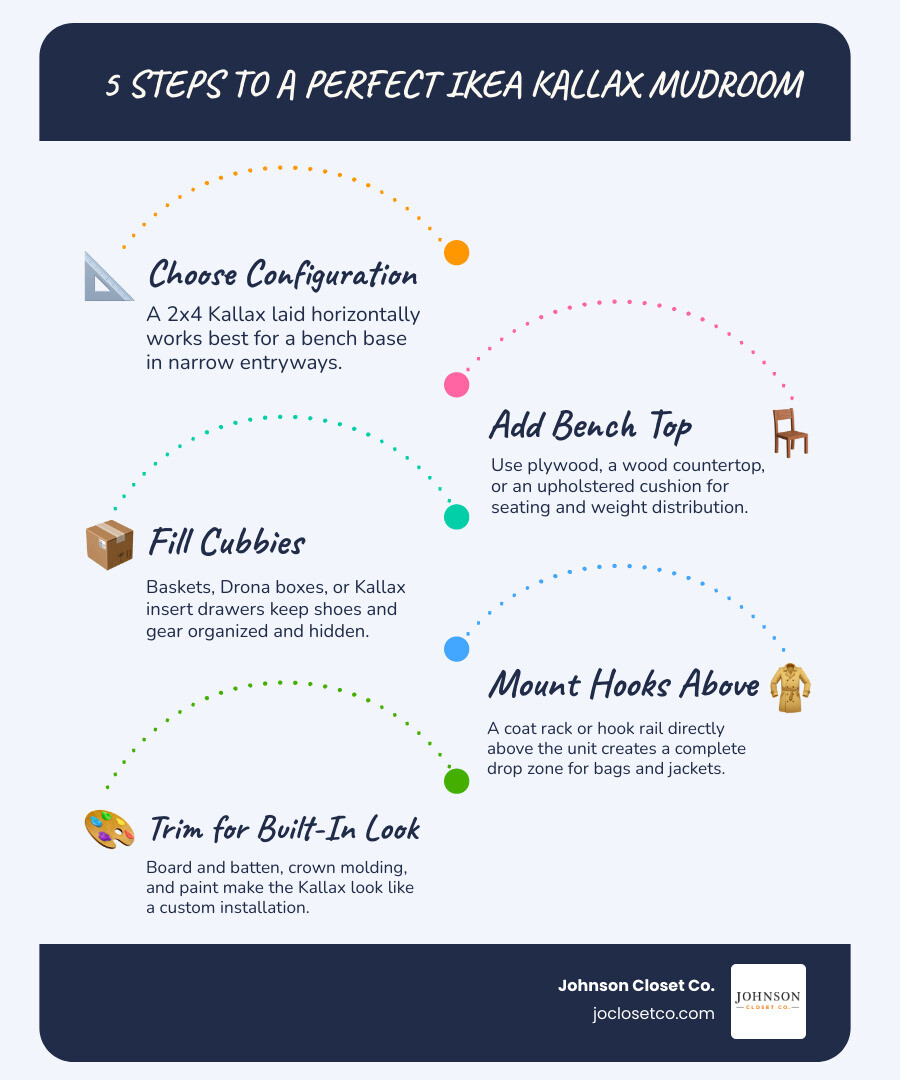
Here's what a basic Kallax mudroom build looks like:
- Choose your Kallax configuration — a 2x4 unit laid horizontally is the most common bench base
- Add a bench top — plywood, a wood countertop, or an upholstered cushion on top creates seating
- Fill the cubbies — use baskets, Drona boxes, or Kallax insert drawers for organized storage
- Mount hooks above — a coat rack or hook rail directly above the unit completes the drop zone
- Trim it out — board and batten, paint, and crown molding make it look like a custom built-in
But here's the thing most tutorials skip: Kallax is made from particleboard with a paper honeycomb core. It's lightweight, affordable, and hackable — but it has real limits. Moisture, heavy loads, and improper wall mounting can all cause problems in a high-traffic mudroom.
This guide walks you through everything: planning your layout, building the bench, adding storage, styling it to look custom, and — critically — doing it safely.
I'm Chris Johnson, founder of Johnson Closet Co., and I've spent years helping homeowners build storage systems that actually hold up — so let me show you exactly how to do this right.
Planning Your IKEA Kallax Mudroom: Configurations and Space Optimization
Before you run to the IKEA store in Tempe or order online, you need to map out your space. Entryways in the Phoenix Valley are often unique; we have wide foyers in Scottsdale, narrow transitional hallways in Gilbert, and laundry-to-garage access points in Chandler. Measuring your space is the absolute first step to ensuring your DIY mudroom doesn't block doorways or look awkwardly crammed in.

Choosing the Right IKEA Kallax Mudroom Dimensions
The beauty of the Kallax series is its modularity. It is available in several configurations that can be adapted for an ikea kallax mudroom project:
- The 1x4 Unit: Measuring approximately 16" x 58", this is the ultimate choice for ultra-narrow entryways. Placed horizontally, it provides a low-profile bench with four shoe cubbies.
- The 2x4 Unit: Measuring roughly 30" x 58", this is the gold standard for mudroom hacks. When laid horizontally, it yields eight spacious cubbies. It is tall enough to sit on comfortably while putting on sandals, yet low enough to leave plenty of vertical wall space for hanging storage.
- The 2x2 Unit: Measuring 30" x 30", this compact square is perfect for tight corners or flanking a doorway.
When planning your shoe storage, keep in mind that each standard Kallax cubby is about 13" x 13". This comfortably fits two pairs of women’s flats or sandals side-by-side. For bulkier men’s athletic shoes or work boots, you may need to nest them or place them on their sides to fit. If you have a larger family, combining two 1x4 units side-by-side can give you a wider, cohesive hallway base.
Expanding Your Mudroom Setup with Simple Wall Storage
A bench is only half the battle. To prevent your entryway from becoming a graveyard for backpacks, pool bags, and sun hats, you must utilize your vertical wall space.
Installing a coat rack or a row of heavy-duty hooks directly above your Kallax bench is the easiest way to organize daily-use items. If you want a more integrated look, you can build a simple DIY pegboard or install board-and-batten backing.
For those looking to build a more comprehensive, floor-to-ceiling storage wall, you can combine your Kallax unit with other modular IKEA systems. Many DIYers flank a central Kallax bench with tall IKEA PAX wardrobes or use IKEA BESTÅ cabinets for closed overhead locker storage. If you want to see how other homeowners have combined kitchen cabinet lines for heavy-duty entryways, look at these designs utilizing IKEA SEKTION cabinets or transitional-style AXSTAD cabinets.
How to Build a DIY Kallax Mudroom Bench
Once you have selected your configuration, it is time to assemble your materials and build the core of your mudroom: the bench seat.
Essential Materials and Tools for the Bench Hack
To build a sturdy, reliable ikea kallax mudroom bench, do not rely solely on the hex key included in the IKEA box. You will need a few additional tools and materials from your local hardware store in Mesa or Gilbert to ensure structural integrity:
- Base Unit: An IKEA Kallax unit (the 2x4 or 1x4 configuration).
- Bench Top Materials: A piece of 3/4-inch plywood cut to the dimensions of the top of your horizontal Kallax, or a pre-finished wood countertop (like the IKEA Akerby or a solid wood slab).
- Upholstery Supplies (Optional): 2-inch high-density foam, batting, and a durable fabric. (Pro-tip: A canvas drop cloth is an incredibly cheap, durable, and neutral-colored upholstery fabric that stands up to kids and pets!).
- Wall Molding & Backing: MDF boards (typically 3 1/2-inch and 2 1/2-inch wide strips) for wall trim or board-and-batten backing.
- Tools: A cordless drill, a brad nailer, a level, a staple gun (if upholstering), wood glue, and shims.
For a great breakdown of how to prepare your space and customize these pieces, check out this guide on how to build a mudroom from IKEA pieces.
Step-by-Step: Adding a Cushioned Seat or Wood Bench Top
Because the outer frame of a Kallax is hollow-core particleboard, sitting directly on it is a recipe for a sagging, cracked unit. You must install a solid top piece to distribute weight safely.
Option A: The Wood Countertop Bench Top
- Measure and Cut: Cut your wood countertop or 3/4-inch plywood to match the exact length and depth of your horizontal Kallax unit.
- Sanding and Sealing: Sand the wood smooth and apply a clear polyurethane or wood stain. In our dry Arizona climate, sealing the wood is crucial to prevent cracking and warping over time.
- Attachment: Apply a generous bead of silicone adhesive or construction adhesive to the top of the Kallax frame. Lay the wood countertop on top and secure it with clamps until dry. You can also screw up through the top shelf of the Kallax into the wood top—just ensure your screws are short enough that they don't pierce through the top of the bench!
Option B: The DIY Cushioned Bench Seat
- Prepare the Plywood Base: Cut a piece of 3/4-inch plywood to match the top of your Kallax. Plywood is highly recommended over pre-finished shelving because it is much easier for staple gun staples to penetrate.
- Layer the Foam and Batting: Lay your 2-inch high-density foam on top of the plywood. Wrap the foam and plywood tightly in quilt batting, securing it to the underside of the plywood with a staple gun.
- Apply the Fabric: Lay your canvas drop cloth or waterproof fabric face down. Place your padded plywood board face down on top of it. Pull the fabric tight and staple it securely to the underside, working from the center of each side outward. Fold the corners neatly like a present.
- Place the Cushion: Simply place the upholstered cushion on top of the Kallax unit. The weight of the cushion combined with friction will keep it in place without screws, making it easy to remove and clean.
Customizing and Styling Your Entryway Storage
Now that your bench is structurally sound, you can dive into the fun part: making it look like a high-end, built-in feature of your home.
Upgrading with Doors, Drawers, and Baskets
The secret to a tidy mudroom is visual harmony. If all your shoes and gear are on display, the space will always look slightly cluttered.
- Baskets and Bins: Use fabric Drona boxes or sturdy wicker baskets in the open cubbies to hide shoes, dog leashes, and sunscreen. Wicker adds a beautiful, warm texture to the entryway, but make sure to choose baskets with smooth interiors or fabric liners so they don't scratch the Kallax shelving over time.
- Kallax Inserts: IKEA sells dedicated insert doors and double-drawer inserts that fit perfectly into the 13" x 13" openings. These are excellent for concealing smaller items like mail, keys, and sunglasses.
- Upgraded Hardware: Replace the standard plastic knobs on your Kallax inserts with high-end brass, matte black, or leather pulls. This tiny change instantly elevates the entire unit.
Painting and Adding Trim for a Built-In Look
To make your ikea kallax mudroom look like custom millwork instead of flat-pack furniture, you need to tie it to your walls and floors.
- Build a Base: Instead of sitting the Kallax directly on the floor, build a simple "kick box" out of 2x4s or plywood to elevate the unit. Wrap this base in trim that matches your home's baseboards.
- Install Board and Batten: Run vertical MDF boards up the wall behind the bench to create a classic board-and-batten look. Top it with a horizontal ledger board where you can securely mount your coat hooks.
- Add Corbels and Top Shelving: Install decorative corbels above your hook line to support a top shelf. You can finish the top shelf with crown molding to bridge the gap to your ceiling.
- Paint Everything One Color: Paint your wall trim, the base, and the Kallax unit the exact same color. Popular, soft neutrals like Benjamin Moore Gray Owl or a crisp, clean white work beautifully. (Note: To paint IKEA's laminate surface, you must use a high-quality bonding primer like shellac-based BIN primer first, otherwise your paint will peel right off!).
For more inspiration on custom integrations and styling, you can explore the community creations over at IKEA Hackers Kallax Mudroom.
Structural Safety and Common Mistakes to Avoid
While a DIY ikea kallax mudroom is an incredibly satisfying weekend project, safety and durability must be your top priorities. Mudrooms are high-traffic zones where kids climb, heavy bags are dropped, and wet shoes are kicked off.
Safely Mounting a Kallax Unit to the Wall
Never leave a mudroom bench or vertical tower freestanding. If a child climbs on the front of the unit to reach a coat hook, the entire structure can tip forward.
- Find the Studs: Use a stud finder to locate the wooden studs behind your drywall.
- L-Brackets: Anchor the Kallax to the wall studs using heavy-duty metal L-brackets. Do not rely on plastic anchors in drywall; they will pull out over time under daily stress.
- French Cleats: If you are hanging a Kallax unit horizontally on the wall as overhead storage, do not simply screw through the thin backing. Build a French cleat system out of 3/4-inch plywood, securing one half to the wall studs and the other to the solid structural frame of the Kallax.
Understanding Kallax Weight Limits and Moisture Risks
The Kallax is constructed using a "board-on-frame" technique. The outer edges are filled with a paper honeycomb core, and the interior dividers are made of thin particleboard.
- Weight Limits: An unmodified horizontal Kallax is not rated to support multiple adults sitting on it. Without a solid wood top to distribute the load, the concentrated weight can cause the top panel to sag or crack.
- Moisture Damage: Particleboard is highly susceptible to moisture. If wet pool towels, damp raincoats, or muddy shoes sit in or on the unit, the laminate will bubble and the underlying wood fibers will swell and crumble. Always seal your wood bench tops with waterproof polyurethane, and use plastic tray liners inside your shoe cubbies to protect the laminate from dampness.
Here is a quick look at how a DIY Kallax hack stacks up against a professional, precision-engineered custom solution:
| Feature | DIY IKEA Kallax Mudroom | Jo Closet Co. Custom Built-In |
|---|---|---|
| Average Cost | ~$450 - $800 (including tools & trim) | Premium investment |
| Time Investment | 5 to 15+ hours of labor | Zero DIY labor (completed in 1 day) |
| Material Quality | Paper-core particleboard & laminate | High-density, moisture-resistant core |
| Fit & Precision | Standard sizes (requires gaps/fillers) | CNC-manufactured exact fit to your walls |
| Durability | Moderate (susceptible to moisture & weight) | Lifetime warranty, heavy-load rated |
Frequently Asked Questions About Entryway Hacks
How much does a typical ikea kallax mudroom hack cost and how long does it take?
A basic DIY ikea kallax mudroom bench can be built for as low as $450 USD in materials and takes about 5 hours of active assembly time. However, if you add board-and-batten wall trim, custom paint, corbels, a top shelf, and high-end baskets, your total material cost will likely rise to $700–$900, and your weekend project will easily stretch into a 2-to-3-day venture.
Can you sit directly on an unmodified ikea kallax mudroom bench?
We highly advise against sitting directly on an unmodified Kallax. Because the outer frame is hollow and filled with cardboard mesh, concentrated weight can easily damage the unit. Adding a solid 3/4-inch plywood top or a hardwood countertop is an absolute necessity to distribute weight safely across the vertical supports.
How do you handle baseboards when installing a kallax mudroom unit flush?
To get that seamless, built-in look, your unit needs to sit completely flush against the wall. You have two options:
- Cut the Baseboards: Use an oscillating multi-tool to cut out the section of baseboard directly behind where your Kallax and its base platform will sit.
- Build a Kick Box: Build a wooden base (or kick box) that elevates your Kallax just high enough to clear your existing baseboards, allowing the unit to push flush against the wall above them. Use shims to ensure the base is perfectly level before attaching your Kallax.
Conclusion
Building a DIY ikea kallax mudroom is a fantastic, budget-friendly way to bring organization to your entryway. With a little creativity, a few sheets of MDF, and some patience, you can create a beautiful drop zone that keeps the daily clutter at bay.
But if you find yourself staring at your non-square walls, worrying about hollow particleboard holding up to your busy family, or realizing you don't have the 15 hours of free time required to execute a high-quality "hack," we are here to help.
At Jo Closet Co., we serve homeowners across the Phoenix Valley—including Scottsdale, Gilbert, Chandler, Mesa, and Tempe. We specialize in designing and installing custom, heavy-duty entryway mudrooms, closets, and garage cabinets. Using our state-of-the-art, in-house CNC manufacturing equipment, we build exact-fit, precision-engineered storage solutions that are built to last a lifetime in our unique Arizona climate.
Skip the flat-pack headache and the crooked filler strips. Check out our Simply Efficient Storage Solutions or visit our Jo Closet Co. Homepage to schedule your free design consultation today. We will help you turn your entryway dreams into a beautiful, stress-free reality!