
What You Need to Know Before Starting a Closet System Installation
Closet system installation is one of the most impactful home upgrades you can do yourself — if you know the right steps.
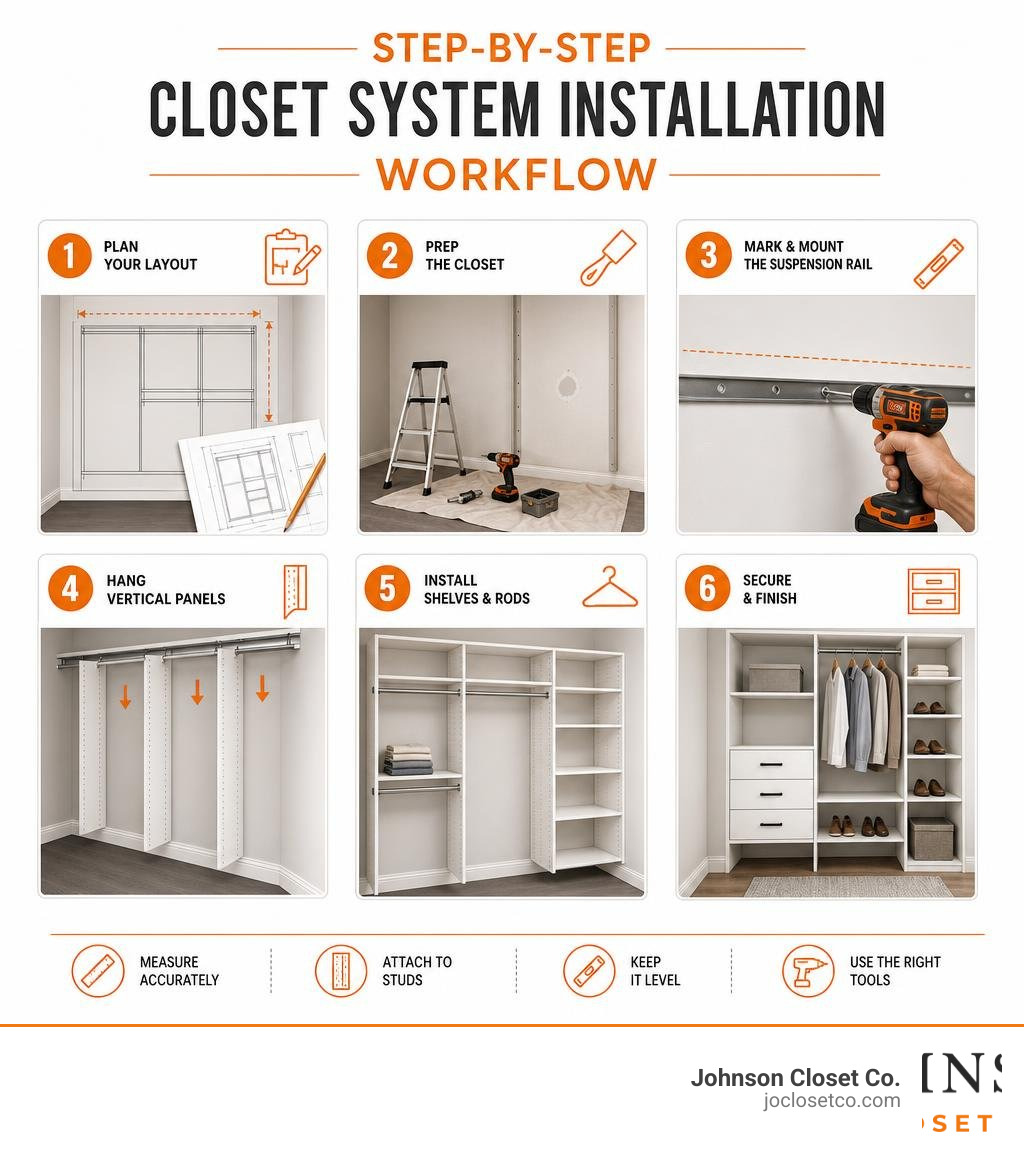
Here's a quick overview of how it works:
- Plan your layout — measure your space, choose a system type (suspended, floor-based, or mixed), and design your configuration
- Prep the closet — remove old shelving, repair walls, locate studs, and paint if needed
- Mark and mount the suspension rail — draw a level line at the correct height and secure the rail to studs
- Hang vertical panels — attach suspension brackets and hang panels on the rail
- Install shelves and rods — add fixed shelves, adjustable shelves, and hanging rods at the correct heights
- Secure and finish — anchor panels to the wall, install drawers and doors, and add accessories
Most homeowners can complete a standard reach-in closet installation in a single day with basic tools.
That said, the details really matter here. Small mistakes — like skipping a stud, ignoring a level, or cutting a shelf too short — can turn a satisfying weekend project into a frustrating redo.
Whether you're replacing a tired single-rod setup or building out a full walk-in system from scratch, this guide walks you through every step of the process clearly and completely.
Planning and Preparing for Your Closet System Installation
Before you pick up a drill or order your new shelving components, you must prepare the physical space. Proper preparation ensures that your new custom storage system fits perfectly and remains anchored securely for years to come.
First, empty the closet completely. This is the perfect opportunity to declutter, sort, and donate items you no longer wear or use. Once the closet is empty, you must remove the existing storage system.
If you are removing an old wood "plank-and-pole" system, use a utility knife to score the paint seal around the cleats and shelves. This simple step prevents the drywall paper from tearing when you pry the wood away. Carefully unscrew or pry the supports from the wall using a claw hammer or crowbar. For old wire systems, use pliers to pull out the metal pins from the plastic wall clips, then gently back the anchors out of the drywall.
With the old hardware gone, your walls will likely look like a block of Swiss cheese. Use a high-quality spackling compound to patch all holes. After the spackle dries, sand the patches smooth, prime them, and apply a fresh coat of paint. We highly recommend painting the closet walls at least 48 hours before starting your new closet system installation. This gives the paint sufficient time to dry and cure completely, preventing it from sticking to or transferring onto your brand-new vertical panels.
Next, locate the wall studs. Standard residential wall studs (2x4s) are typically located on 16-inch centers, measuring from one of the corners of the room. Use an electronic stud finder to locate the studs along the wall where your system will hang. Mark both the left and right edges of each stud so you can pinpoint the exact center.
Finally, verify your closet's dimensions. To install a standard, highly functional reach-in closet system, your space must be at least 30 inches deep. This depth ensures your clothes can hang freely without getting pinched by the closet doors. If you are planning a larger walk-in project, budgeting is key. You can check out our detailed guide on walk-in closet installation cost to align your design dreams with a realistic budget.
Choosing the Right System Design and Layout
When designing your closet, you must choose between three primary structural methods:
- Suspended (Wall-Hung) Systems: These systems hang entirely from a heavy-duty steel suspension rail mounted to the wall studs. The vertical panels do not touch the floor, which keeps your flooring completely clear and makes cleaning a breeze.
- Floor-Based Systems: These units sit directly on the floor and are anchored to the wall at the top for safety. They offer a built-in, furniture-like aesthetic but require you to modify or cut your baseboards so the units sit flush against the drywall.
- Mixed Systems: These combine both methods, using floor-based towers for heavy drawer banks and suspended sections for hanging rods and upper shelving.
While budget wire systems are common, custom wood and laminate shelving systems offer superior durability, aesthetic appeal, and weight capacity. If you want to compare options, you can read more about 10-inch deep wire closet shelving to understand how wire depths compare to solid wood and laminate solutions.
Essential Tools and Materials for a Successful Closet System Installation
Having the correct tools on hand will save you time and prevent costly installation errors. Gather the following items before you begin:
- Electronic stud finder
- 4-foot or 6-foot bubble level (essential for keeping rails and panels straight)
- Power drill and drill bits (1/8-inch for pilot holes, 3/8-inch if using drywall anchors)
- Manual Phillips screwdriver (crucial for tightening delicate cam-lock hardware without stripping it)
- Hacksaw or pipe cutter (for cutting metal hanging rods)
- Miter saw or jigsaw with a fine-tooth carbide blade (for cutting wood or laminate shelves)
- Thick painter's tape (to prevent laminate chipping during cuts)
- Tape measure (25-foot) and a pencil
- Heavy-duty toggle bolts or Snap Toggles (for secure anchoring when a stud isn't perfectly aligned)
For specific modular designs, reviewing a 4–8 ft. Adjustable Closet System manual can provide additional context on standard retail hardware configurations.
Step-by-Step Guide to Installing a Suspended System
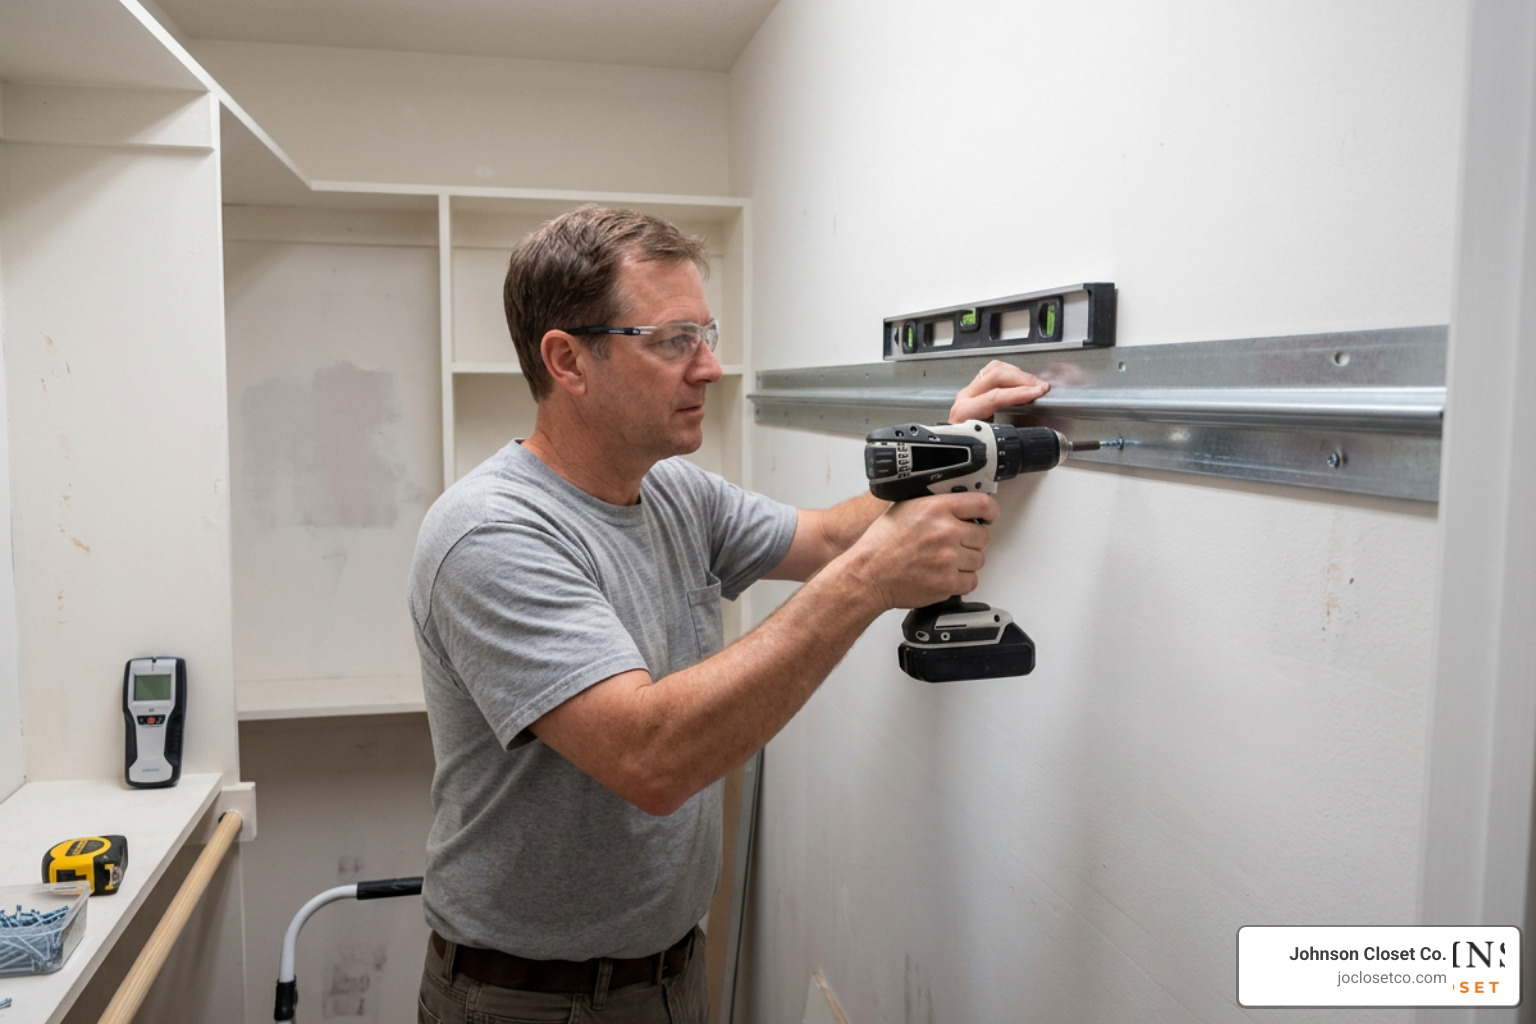
Suspended systems are highly popular because they are incredibly versatile and easier to install on uneven floors. The entire weight of the system is distributed across a single horizontal suspension rail, making the rail's placement the most critical step of the entire process.
Measuring, Marking, and Securing the Suspension Rail
To achieve a standard 84-inch finished height for your closet system, you must mount your suspension rail precisely.
- Measure up from the floor and draw a level line across the back wall of the closet. This line should be exactly 81 3/4 inches (or 82 inches, depending on your manufacturer's specifications) off the ground.
- Use a 4-foot or 6-foot level to ensure this line is perfectly straight across the entire span. Do not follow the ceiling or the floor, as they are rarely level.
- Use your stud finder to locate the studs along this line and mark their centers.
- Align the top of your suspension rail with your drawn level line.
- Secure the rail to the studs using 2.5-inch wood or deck screws. Drive two screws into each stud location — one straight in and one at a slight downward angle toward the center of the stud for maximum holding power.
- If the end of your suspension rail extends past the last stud by more than 4 inches, you must secure the end of the rail using a heavy-duty Snap Toggle or toggle bolt anchor. Never leave the end of a suspension rail unsupported.
Hanging Vertical Panels and Assembling the Framework
Once your suspension rail is securely mounted and level, you can begin assembling the core framework of your closet.
First, lay your vertical panels (which are standardly 3/4 inches thick) on a clean, non-scratch surface like a pair of saw horses or a blanket. Attach the suspension brackets to the pre-drilled holes near the top notch of each vertical panel using the provided 13mm or 16mm Euro screws.
Next, lift and hang the vertical panels onto the suspension rail.

Ensure that the brackets on the farthest left and right panels face inward so they remain hidden. A major advantage of high-quality suspended systems is that the suspension brackets feature dual-axis adjustment screws. If your walls are bowed or out of plumb, you can turn these adjustment screws with a manual screwdriver to raise or lower individual panels by up to 3/8 of an inch, or move them in and out to align them perfectly.
To lock the vertical panels into a rigid, structurally sound framework, you must install your top, middle, and bottom fixed shelves. Insert the cam-lock fittings into the pre-drilled 20mm holes on the fixed shelves. Position the shelves over the cam studs on the vertical panels, and use a manual Phillips screwdriver to turn the locking mechanism 180 degrees clockwise. You will feel the shelf pull snug and lock securely against the panel.
Keep these critical structural rules in mind during assembly:
- The 3-inch anchor rule: Any vertical hanging panel must not be located more than 3 inches to the left or right of a secure wall anchor location (either a stud or a heavy-duty toggle anchor).
- The 36-inch span limit: Spans over 36 inches between vertical panels are not recommended, as the shelves will sag over time under the weight of your items.
- Tower placement: Most standard storage towers are between 82 and 83 inches tall. If you are installing a central tower system, the tower should be mounted no more than 4 feet away from either side wall to maintain structural balance.
Customizing Shelves, Rods, Drawers, and Doors
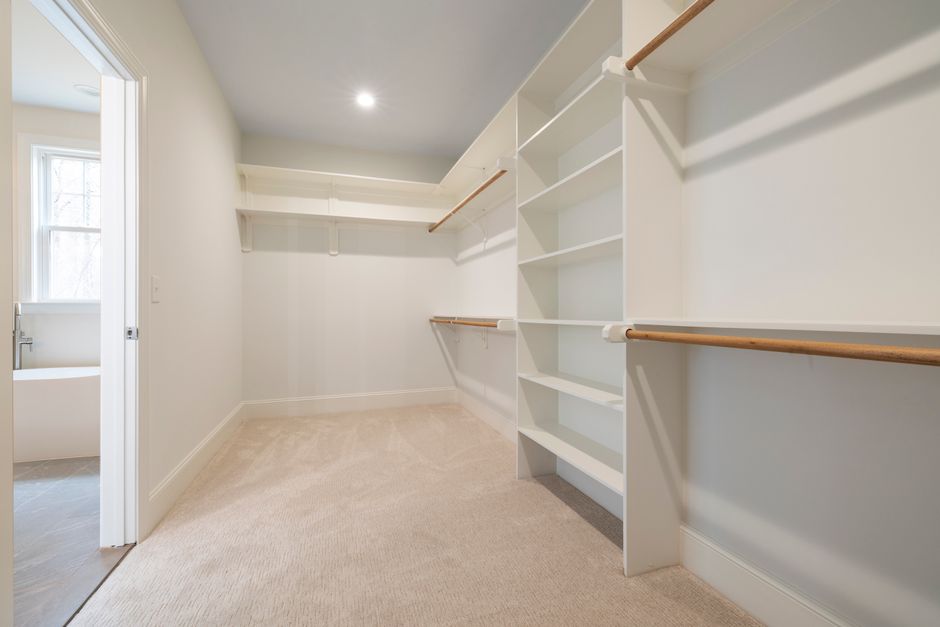
With the main structural framework locked and leveled, you can begin customizing your closet with shelves, hanging rods, drawers, and doors to fit your specific wardrobe needs.
Cutting Shelves and Rods for a Perfect Wall-to-Wall Fit
In a perfect world, closet walls would be perfectly square. In reality, they are almost always bowed or out of plumb. To avoid ruining your materials, always measure the width of your closet space at both the front and the back of the opening before making any cuts.
When cutting laminate or wood shelves to size:
- Mark your cut line clearly on the shelf.
- Wrap a piece of thick painter's tape or masking tape completely around the cut line. This supports the delicate laminate surface and prevents it from cracking or chipping.
- Use a miter saw or a jigsaw equipped with a fine-tooth carbide blade.
- For the cleanest possible edge, cut halfway through one side of the shelf, flip the shelf over, and complete the cut from the opposite side.
When cutting metal wardrobe rods:
- Measure the span between the vertical panels.
- Cut the rod using a hacksaw or pipe cutter so that the finished rod length is exactly 1/4 inch shorter than the shelf space. This small gap allows the rod to snap easily into the plastic or metal rod cups without forcing the vertical panels outward.
Installing Drawers, Doors, and Hardware
Drawers and doors elevate a basic closet system into a premium, built-in wardrobe.
To install drawers:
- Extend the drawer slide completely and locate the small black plastic release lever. Push the lever to separate the male portion (which attaches to the drawer box) from the female portion (which mounts to the vertical panel).
- Mount the female slide portion to the vertical panel using 10.5mm Euro screws. Always start from the bottom of your tower and measure upward, referencing your design plan for exact hole spacing based on your drawer front heights.
- Mount the male slide portion to the sides of your drawer box using flathead wood screws.
- Align the slides and gently push the drawer box into the tower until you hear it click into place.
To install doors:
- Mount the hinge plates to the pre-drilled holes on the vertical panels.
- Insert the concealed hinges into the cup holes on the back of your closet doors and secure them.
- Snap the hinge arms onto the wall plates.
- Use a manual Phillips screwdriver to turn the adjustment screws on the hinge arms to align the doors vertically, horizontally, and in depth. Never use a power drill on hinge plates or doors, as you can easily strip the wood fibers.
Common Pitfalls to Avoid During Your Closet System Installation
To ensure your installation goes smoothly, avoid these frequent mistakes:
- Overtightening screws: Using a power drill to tighten cam-locks or hinge plates will strip the pre-drilled holes in particleboard or MDF. Always hand-tighten these components.
- Ignoring levels: Never assume your floor or ceiling is straight. Always rely strictly on your bubble level when mounting rails and panels.
- Skipping studs: Attempting to hang a heavy closet system entirely on standard drywall anchors is a recipe for structural failure. Your suspension rail must be anchored directly into wood studs.
- Misaligning slides: If your drawer slides are even 1/16 of an inch out of alignment from left to right, your drawers will stick, bind, or fail to close smoothly.
Frequently Asked Questions About Closet Installation

| Feature / Detail | DIY Closet Installation | Professional Installation (Jo Closet Co.) |
|---|---|---|
| Average Cost | Cost of materials ($200 - $1,500+) | Starts at $79.35 - $110 per sq. ft. (May 2026 average) |
| Time Investment | 1 to 2 weekends of labor | Completed in a single day |
| Tools Required | Must purchase or rent specialty tools | None (all professional gear provided) |
| Precision & Fit | Limited to standard retail kit sizes | Exact-fit, CNC-manufactured panels |
| Warranty | Limited product-only warranty | Comprehensive product & installation warranty |
How much does a professional closet organizer installation cost?
As of May 2026, the estimated national average cost to install closet organizers professionally starts at $79.35 to $110 per square foot. The final price depends heavily on the size of your space, the materials selected (such as high-end laminates or real wood veneers), and the complexity of your layout (drawers, jewelry organizers, and integrated lighting).
If you are looking for professional design support in the Phoenix Valley, including Scottsdale, Mesa, Tempe, and Phoenix, Jo Closet Co. offers custom 3D designs and professional installation to bring your dream closet to life.
Can I install a closet system over existing baseboards?
If you are installing a suspended (wall-hung) system, yes! Because suspended systems hang above the floor, they completely clear your baseboards.
However, if you are installing a floor-based system, the units must sit completely flush against the back wall to remain structurally stable. In this case, you must remove your baseboards using a flathead screwdriver and hammer, or cut notches out of the back of the vertical panels to accommodate your baseboard trim. Use leveling wedges under floor-based units to compensate for any unevenness in your flooring.
What is the standard height for single and double hanging rods?
Standardizing your rod heights ensures your clothes hang beautifully without dragging:
- Single-hang rods: Install at 70 inches from the floor. This provides ample clearance for long coats, dresses, and jumpsuits.
- Double-hang rods: Install the upper rail at 84 inches from the floor, and the lower rail at 42 inches from the floor. This configuration perfectly splits the vertical space, providing approximately 41 inches of clear hanging space for shirts, folded pants, and jackets on both tiers.
Conclusion
Installing your own closet organizer can be a rewarding home improvement project that instantly elevates your daily routine. By taking the time to measure precisely, locate your wall studs, keep your framework perfectly level, and cut your components with care, you can achieve a beautiful, functional space that keeps your wardrobe organized for years.
However, if your closet has challenging angles, bowed walls, or if you simply want a flawless, luxury look without the weekend hassle, we are here to help.
At Jo Closet Co., we are the Phoenix Valley's premier custom storage experts. We design and install beautifully tailored closets, garage cabinets, and entertainment centers across Phoenix Valley AZ, Scottsdale AZ, Gilbert AZ, Chandler AZ, Mesa AZ, and Tempe AZ. Our unique advantage is our in-house precision manufacturing. Using state-of-the-art CNC equipment, we engineer exact-fit solutions tailored to the millimeter of your unique space.
Ready to transform your home? Explore our Simply Efficient custom closets collection, or visit Jo Closet Co. today to schedule your free, professional 3D design consultation!